How to Set Limits/Parental Controls on Your Smart Speakers
It is necessary to Set Limits/Parental Controls on your Google Nest or Amazon Echo to make sure kids don’t access features they shouldn’t. If you own a smart speaker or two and also have children, you know that they’re very comfortable using the technology, shouting out commands to Alexa, Siri, or Google Assistant as if it was second nature. Even if your kids know more about your smart speakers and their capabilities than you do, you don’t necessarily want them to access every feature or bit of information, whether that means music with inappropriate lyrics or the list of work meetings that you’ve got on your calendar.
Every major smart speaker on the market comes with some parental controls you can activate, even if some devices are more comprehensive than others in this department. Here’s how to set them up.
Top European Medical Schools
Google Nest
If you have a Google Nest (previously Google Home) speaker in your home, there are a couple of options for restricting what kids can access and hear through these devices. First, you can open up the Google Home app on your phone, then tap Settings and Digital Wellbeing. From the next screen you can set up both filters and a downtime schedule for any of your speakers.


Filters cover music, podcasts, news, calls, and messages. You can also restrict the speaker to “family-friendly actions” from here, whatever that means. The downtime schedule, meanwhile, lets you set specific times when the speaker won’t work, except for alarms, timers, and home automation requests.
Further settings can be found by choosing the Nest speaker from the front page of the Google Home app, then tapping on the cog icon (top right). Pick Notifications and Digital Wellbeing and you’re able to access the options we’ve already looked at, plus settings for alerts, night mode, do not disturb, and more.
If you want to go all in with parental controls for your Google Nest speakers, you can set your kids up with their own Google accounts and add them as part of your Google Family Link group. The speakers are smart enough to recognize the voices of your children and tailor the responses accordingly. From the Family Link app on your phone, pick Manage Settings, Google Assistant, and Add your child to new devices. (Set Limits/Parental Controls)
Amazon Echo
The parental controls for Amazon Echo speakers are pretty comprehensive—you can even buy Echos that are specifically for kids —and they combine settings in both the Alexa app on your phone and the Amazon Parents Dashboard on the web. If you’ve got little ones, then you’ve already added them through this dashboard.
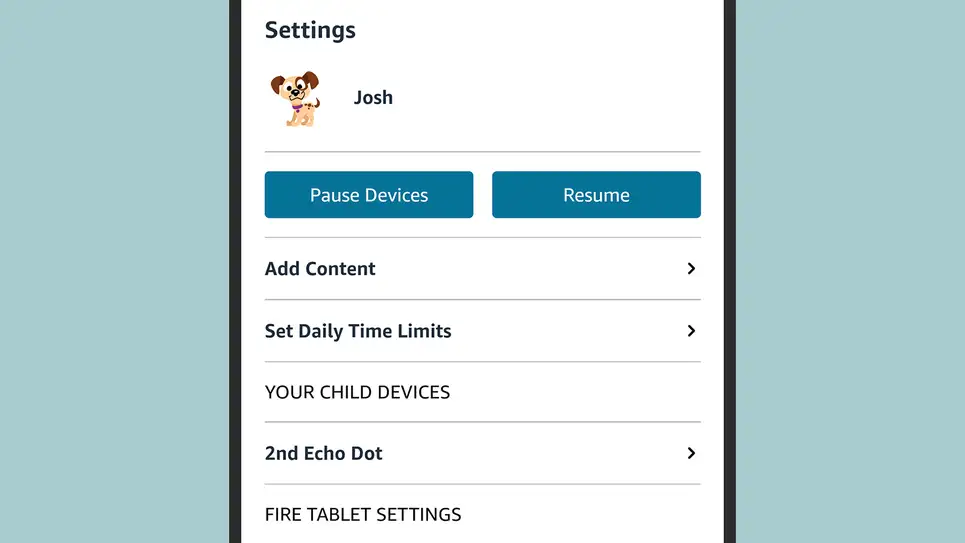
On the Alexa smartphone app, tap Devices, Echo & Alexa, and then the speaker you want to work with. Tap the cog icon (top right) to get to the device’s settings screen, and scroll down and choose Amazon Kids. Turn on the feature to set up parental controls. If you don’t already have child accounts linked to your main Amazon account, you’ll be prompted to add them now.
With that done, tap Amazon Kids Settings on the same screen to control what your children are allowed to do. These settings cover daily time limits across multiple devices, the kind of content they can access, and so on. Tap the Echo speaker to configure this device in particular: You can turn on an explicit filter for music, and enable or disable communication features such as calling and messaging.
Sign into the web interface for your Amazon family and you can access all the settings available on your phone and then some—for example, extra options cover website filtering. The Echo you’ve specified as kid-friendly can be accessed from here, too, and if you need to you can add multiple kids to one speaker. (Set Limits/Parental Controls)
US Diversity Visa Lottery Program 2022/2023
Apple HomePod
If you’re the owner of a HomePod or a HomePod Mini, then there aren’t any specific parental controls to configure, but you can make your Apple smart speaker a little more family-friendly. From your iPhone, iPad, or Mac, find the HomePod or HomePod Mini in the Home app, then long press or double-click on its icon.
Click or tap on the cog icon (bottom right) to get to the settings for the HomePod or HomePod Mini. The first one to take note of is the Allow Explicit Content toggle switch, which you’re probably going to want to turn off if you’ve got little ones running around within earshot of the smart speaker. This blocks music and podcasts that have been marked as explicit in your library.
Further down the menu, tap or click Personal Requests and disable the feature. This stops your kids (or anyone else passing by your Apple speaker) from sending messages, making calls, or creating reminders via the Apple ID that’s associated with the HomePod or HomePod Mini. Of course it also means you can’t access these features either, but you might consider it worth the trade-off.

Depending on where the speaker is and how you use it, you might want to assign to the Apple ID one of your children has, if you’ve configured Family Sharing. You can change the Apple ID the HomePod or HomePod Mini uses for music and podcast control by tapping the Primary User entry in the settings, and picking someone else from your family (there’s also a generic HomePod Account option here). Note though that this account is only used if Siri’s voice recognition abilities can’t tell who is speaking out the voice commands.
SHARE TO HELP OTHERS.